{{FULL_COURSE}} Homework 5 - Post-Processing and Noise Functions
Overview
-----
You will practice working with basic OpenGL constructs and functions by
writing code to construct a cube out of vertex buffer objects. You will also
program portions of OpenGL's graphics pipeline by writing a few different
vertex and fragment shaders to apply different coloration effects to
the surfaces of 3D models.
Supplied Code
---------
Click here to access
the homework's Github repository.
We will provide you with a basic Qt GUI that draws scenes using OpenGL, along
with a user interface that allows you to switch between different shaders with
which to color the surface of the object.
Conceptual Questions (Due Tuesday, February 27 at 11:59 PM)
-------------
Before you begin the programming portion of this homework assignment, read and answer the following conceptual questions. Your answers should be submitted on Canvas.
* (5 pts) Given the method by which we divide our 2D space into a 2D grid when computing FBM, Worley noise, and Perlin noise, how might we extend this process into three dimensions? In the case of 3D Worley noise, how many cells would we have to examine to find the closest cell point?
* (5 pts) In at most three sentences, describe the general steps one would need to take in order to render a 3D model with a screen-space post-process effect applied to it using OpenGL.
Help Log (5 points)
-------
Maintain a log of all help you receive and resources you use. Make sure the date
and time, the names of everyone you work with or get help from, and every URL
you use, except as noted in the collaboration policy. Also briefly log your
question, bug or the topic you were looking up/discussing. Ideally, you should
also the answer to your question or solution to your bug. This will help you
learn and provide a useful reference for future assignments and exams. This also
helps us know if there is a topic that people are finding difficult.
If you did not use external resources or otherwise receive help, please submit
a help log that states you did not receive external help.
You may submit your help log as an ASCII (plain) text file or as a PDF. Refer
to the Policies section of the course web site for more specifications.
Code Requirements (Due Thursday, February 29 at 11:59 PM)
-------
### Surface Shader Programs
For the sections that require you to modify shader files, you can find the
shaders under `Other files/glsl` in Qt Creator's project file
browser. Note that we have provided you with a working Lambertian shader filled
with comments explaining each shader program element. You can find this program
in `lambert.vert.glsl` and `lambert.frag.glsl`.
### Polar Spherical Camera Model (10 points) ###
In the `Camera` class, implement the `RotateAboutGlobalUp`, `RotateAboutLocalRight`, `Zoom`, `PanAlongRight`, and `PanAlongUp` functions. What each function should do is described in comments in the base code. The end goal is to have a camera that you can spin around the model using the mouse, while keeping the model centered on screen. This mirrors the polar spherical camera model commonly used in commercial software such as Autodesk Maya.
We have provided code in `MyGL::mousePressEvent`, `MyGL::mouseMoveEvent`, and `MyGL::wheelEvent` that calls these `Camera` functions. Examine the provided code to understand how different mouse actions should affect the camera movement.
### Blinn-Phong Reflection Shader (5 points) ###
Add code to the shader files `blinn_phong.vert.glsl` and `blinn_phong.frag.glsl`
in order to implement Blinn-Phong reflection on the surface of the models
provided. Blinn-Phong reflection is a method of emulating the specular
highlights one sees on materials like plastic. To compute this shading effect,
one needs to know the following information for a given pixel fragment:
* The vector from the fragment's world-space position to the camera, i.e. the
view vector
* The vector from the fragment's world-space position to the light source
(assuming a point light source)
* The surface normal at the fragment
Given these values, one can compute the intensity of the specular highlight
for the current fragment using the following formula:
`specularIntensity = max(pow(dot(H, N), exp), 0)`, where `H` is the average of
the view vector and the light vector and `N` is the surface normal. As always,
both vectors should be normalized. The `exp` value is any number greater than 1.
The higher the `exp`, the smaller and brighter the specular highlight.
Once you have the specular highlight intensity, you can add it to a basic
Lambertian shading calculation, and achieve an effect like this:
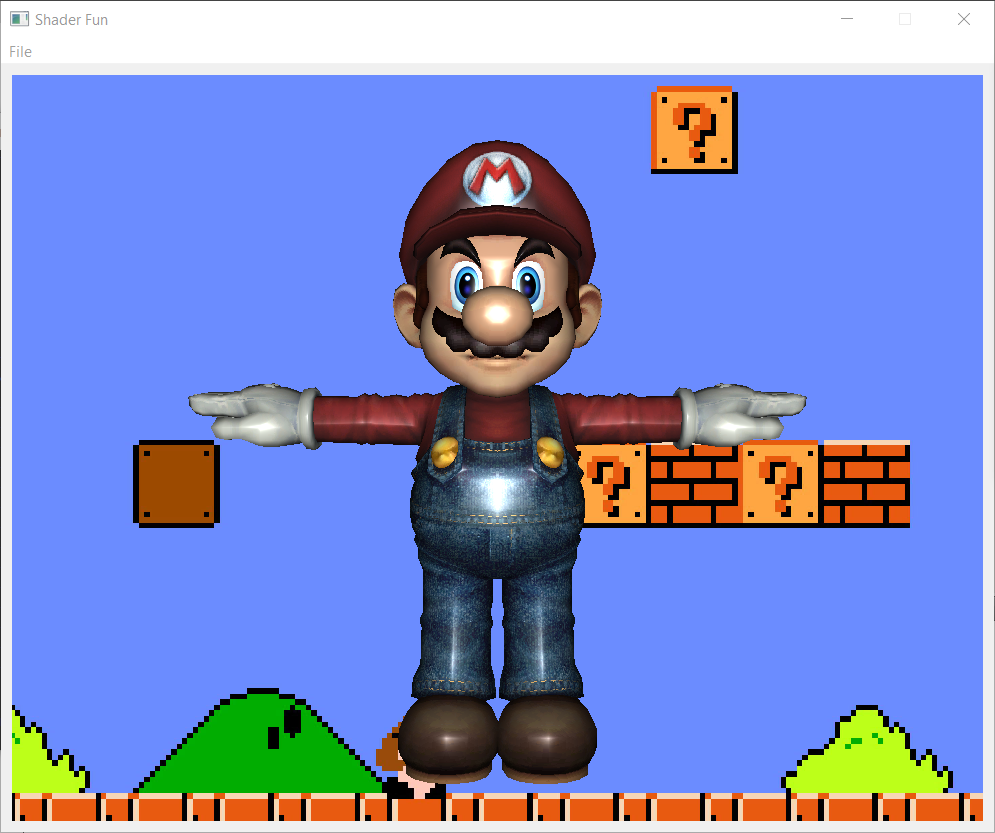 ### Matcap Reflection Shader (10 points) ###
Add code to the shader files `matcap.vert.glsl` and `matcap.frag.glsl`
in order to implement the "matcap" method of shading surfaces on the models
provided. Matcap shading is most commonly used to give 3D models the appearance
of a complex material with dynamic lighting without having to perform expensive
lighting calculations. The implementation of the matcap technique is actually
quite simple, yet with the right textures it can look photorealistic. Given
a 2D texture like this:
### Matcap Reflection Shader (10 points) ###
Add code to the shader files `matcap.vert.glsl` and `matcap.frag.glsl`
in order to implement the "matcap" method of shading surfaces on the models
provided. Matcap shading is most commonly used to give 3D models the appearance
of a complex material with dynamic lighting without having to perform expensive
lighting calculations. The implementation of the matcap technique is actually
quite simple, yet with the right textures it can look photorealistic. Given
a 2D texture like this:
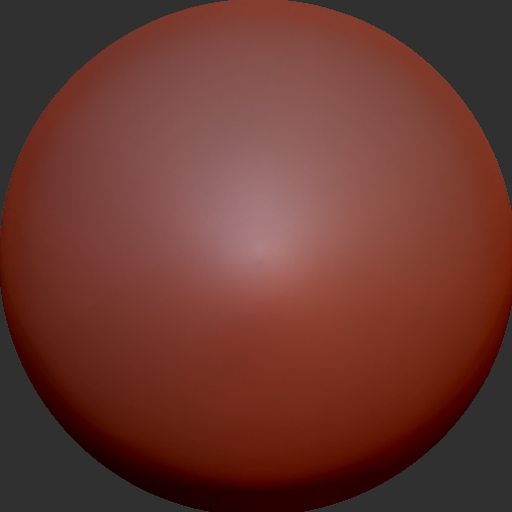 you can make an entire model appear to be made of reddish clay:
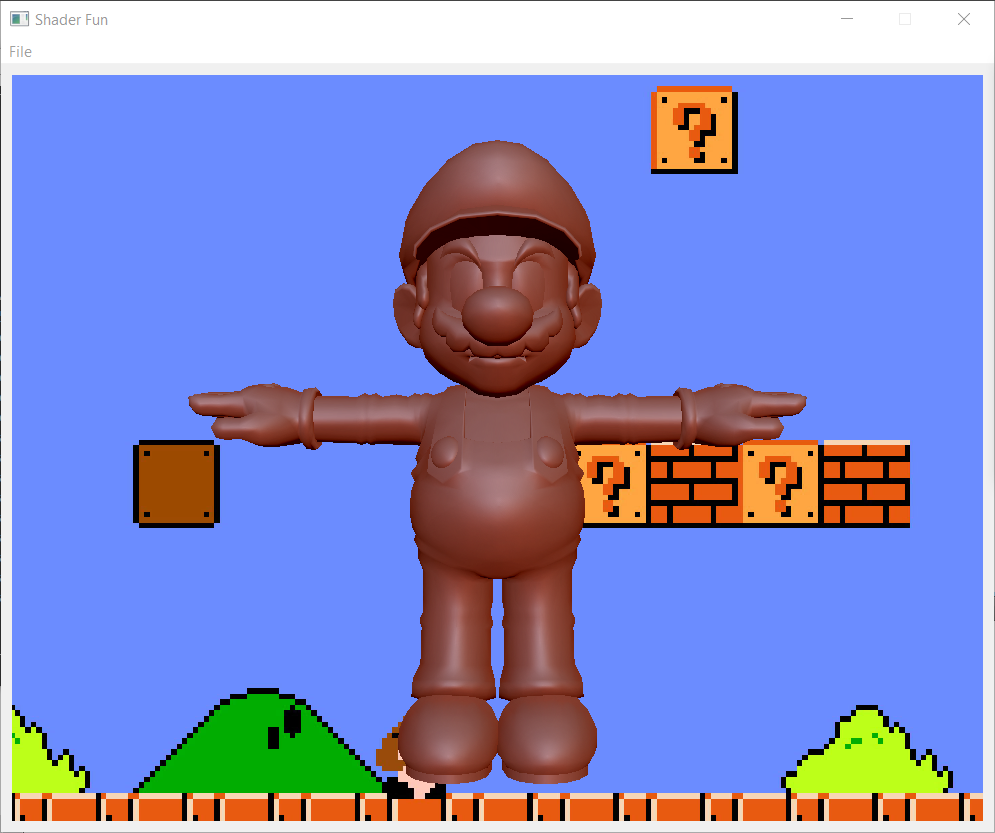 All that needs to be done to achieve this effect is to map the (x, y)
coordinates of the surface normal of a fragment to a point in the circular
matcap texture. So, if the (x, y) is (-1, 0), that would map to the leftmost
point of the circle. Sample the texture at this point to find the color of
your surface.
### Custom vertex deformation shader (20 points) ###
Write `custom_surface.vert.glsl` and `custom_surface.frag.glsl` so that the model's vertex positions are modified in one of the following ways (your choice):
- They interpolate between their undeformed shape and the shape of some other object, such as a cube or sphere, over time.
- They deform according to the value of a 3D noise function such as FBM, Worley, or Perlin, where the vertex's world-space position is the input to the noise function. This deformation should change over time in some way.
- They deform in some interesting and clearly-directed animation, such as causing the model to melt then un-melt repeatedly over time, or using piecewise homogeneous transformations to make Mario appear to walk in place. The specifics of the animation are up to you; it just has to look intentional and identifiable as some action.
Here is an example recording of what we created by playing around with functions:
All that needs to be done to achieve this effect is to map the (x, y)
coordinates of the surface normal of a fragment to a point in the circular
matcap texture. So, if the (x, y) is (-1, 0), that would map to the leftmost
point of the circle. Sample the texture at this point to find the color of
your surface.
### Custom vertex deformation shader (20 points) ###
Write `custom_surface.vert.glsl` and `custom_surface.frag.glsl` so that the model's vertex positions are modified in one of the following ways (your choice):
- They interpolate between their undeformed shape and the shape of some other object, such as a cube or sphere, over time.
- They deform according to the value of a 3D noise function such as FBM, Worley, or Perlin, where the vertex's world-space position is the input to the noise function. This deformation should change over time in some way.
- They deform in some interesting and clearly-directed animation, such as causing the model to melt then un-melt repeatedly over time, or using piecewise homogeneous transformations to make Mario appear to walk in place. The specifics of the animation are up to you; it just has to look intentional and identifiable as some action.
Here is an example recording of what we created by playing around with functions:
 ### Setting up the post-process pipeline (5 points) ###
Before you can test any of the post-process shaders listed below,
you will need to add code to `render3dScene` and `renderPostProcess` in order to divert your first render pass's output to a custom frame buffer, then reconnect the render output to the default frame buffer. __You will also need to add a call to `renderPostProcess` in `paintGL` just after the call to `render3dScene`__.
Refer to the TODO comments at the top of both `render3dScene` an `renderPostProcess` for more details.
### Post-Process Shader Programs
For the sections that require you to modify post-process shader files, you can find the
shaders under `Other files/glsl/` in Qt Creator's project file
browser.
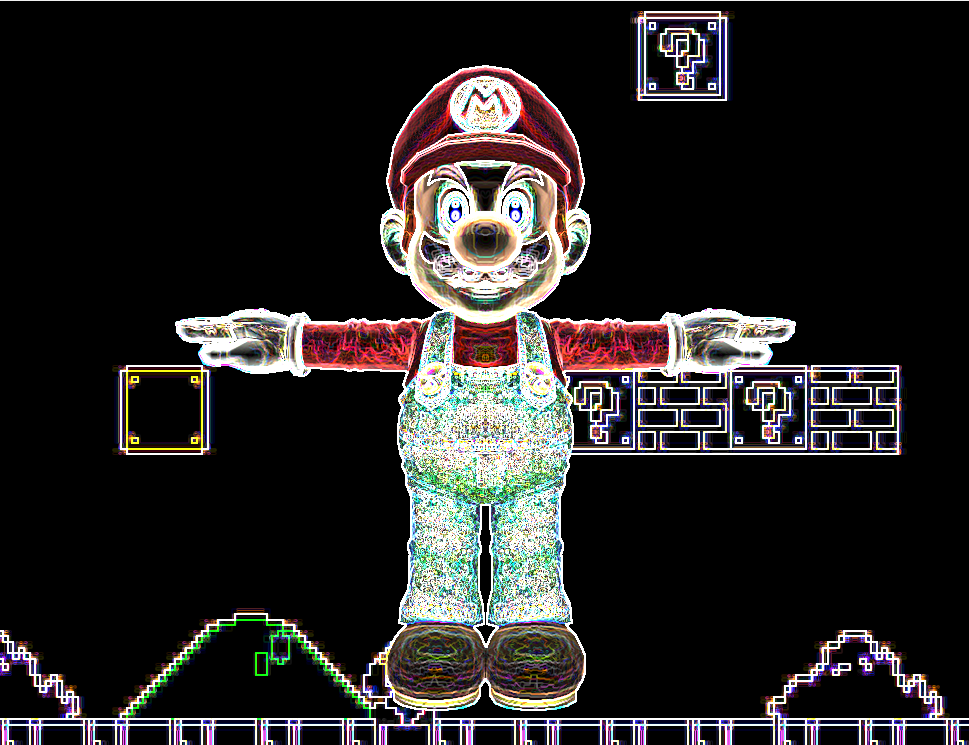
### Sobel Filter Shader (8 points) ###
Add code to the shader file `sobel.frag.glsl` in order to implement a
post-process effect that detects and enhances the edges of shapes in your 3D
scene. What a Sobel filter does is compute the approximate gradient
(i.e. slope) of the color at each pixel, and where the color abruptly changes it
returns a high value, otherwise it returns roughly black, or a slope of zero.
To compute a Sobel filter, you need two kernels: one for computing the
horizontal gradient, and one for computing the vertical gradient:
```
Horizontal =
| 3 0 -3 |
| 10 0 -10 |
| 3 0 -3 |
Vertical =
| 3 10 3 |
| 0 0 0 |
| -3 -10 -3 |
```
Apply each of these kernels to the 3x3 set of pixels surrounding a pixel to compute
its gradients. This is done by, for example, multiplying the upper-left cell of a kernel
with the RGB value of the pixel that lies to the upper-left of the pixel you are evaluating
the color of.
Once you have your horizontal and vertical color gradients, square them, sum them,
and set the output of your shader to the square root that that sum.
This is what we rendered using the Sobel kernels above:
### Setting up the post-process pipeline (5 points) ###
Before you can test any of the post-process shaders listed below,
you will need to add code to `render3dScene` and `renderPostProcess` in order to divert your first render pass's output to a custom frame buffer, then reconnect the render output to the default frame buffer. __You will also need to add a call to `renderPostProcess` in `paintGL` just after the call to `render3dScene`__.
Refer to the TODO comments at the top of both `render3dScene` an `renderPostProcess` for more details.
### Post-Process Shader Programs
For the sections that require you to modify post-process shader files, you can find the
shaders under `Other files/glsl/` in Qt Creator's project file
browser.
### Sobel Filter Shader (8 points) ###
Add code to the shader file `sobel.frag.glsl` in order to implement a
post-process effect that detects and enhances the edges of shapes in your 3D
scene. What a Sobel filter does is compute the approximate gradient
(i.e. slope) of the color at each pixel, and where the color abruptly changes it
returns a high value, otherwise it returns roughly black, or a slope of zero.
To compute a Sobel filter, you need two kernels: one for computing the
horizontal gradient, and one for computing the vertical gradient:
```
Horizontal =
| 3 0 -3 |
| 10 0 -10 |
| 3 0 -3 |
Vertical =
| 3 10 3 |
| 0 0 0 |
| -3 -10 -3 |
```
Apply each of these kernels to the 3x3 set of pixels surrounding a pixel to compute
its gradients. This is done by, for example, multiplying the upper-left cell of a kernel
with the RGB value of the pixel that lies to the upper-left of the pixel you are evaluating
the color of.
Once you have your horizontal and vertical color gradients, square them, sum them,
and set the output of your shader to the square root that that sum.
This is what we rendered using the Sobel kernels above:
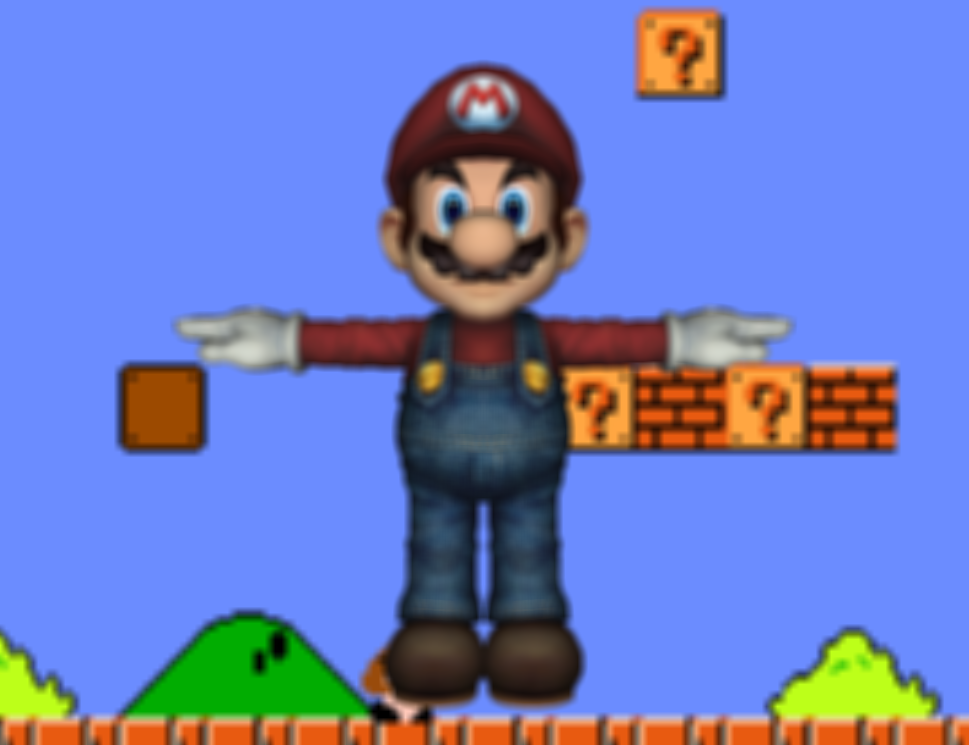
 ### Gaussian Blur Shader (7 points) ###
Add code to the shader file `blur.frag.glsl` in order to implement a
post-process effect that blurs your 3D scene. A Gaussian blur effectively
performs a weighted average of NxN pixels and stores the result in the pixel
at the center of that NxN box (this means N must always be odd). The larger
the blur radius, the smoother the blur will be. Additionally, altering the
weighting of the blur will increase or decrease its intensity. If you take a
look at slides 23 - 24 in the procedural color slides, you'll have a better
idea of how a Gaussian blur works.
In order to achieve the image below, create a const array of 121 floats just
__above__ main(), hard-coding into it the kernel values from the Gaussian kernel
listed below. Index into
this array the same way you did your Z-buffer in hw03 to treat it like an 11x11 array.
```
0.006849, 0.007239, 0.007559, 0.007795, 0.007941, 0.00799, 0.007941, 0.007795, 0.007559, 0.007239, 0.006849,
0.007239, 0.007653, 0.00799, 0.00824, 0.008394, 0.008446, 0.008394, 0.00824, 0.00799, 0.007653, 0.007239,
0.007559, 0.00799, 0.008342, 0.008604, 0.008764, 0.008819, 0.008764, 0.008604, 0.008342, 0.00799, 0.007559,
0.007795, 0.00824, 0.008604, 0.008873, 0.009039, 0.009095, 0.009039, 0.008873, 0.008604, 0.00824, 0.007795,
0.007941, 0.008394, 0.008764, 0.009039, 0.009208, 0.009265, 0.009208, 0.009039, 0.008764, 0.008394, 0.007941,
0.00799, 0.008446, 0.008819, 0.009095, 0.009265, 0.009322, 0.009265, 0.009095, 0.008819, 0.008446, 0.00799,
0.007941, 0.008394, 0.008764, 0.009039, 0.009208, 0.009265, 0.009208, 0.009039, 0.008764, 0.008394, 0.007941,
0.007795, 0.00824, 0.008604, 0.008873, 0.009039, 0.009095, 0.009039, 0.008873, 0.008604, 0.00824, 0.007795,
0.007559, 0.00799, 0.008342, 0.008604, 0.008764, 0.008819, 0.008764, 0.008604, 0.008342, 0.00799, 0.007559,
0.007239, 0.007653, 0.00799, 0.00824, 0.008394, 0.008446, 0.008394, 0.00824, 0.00799, 0.007653, 0.007239,
0.006849, 0.007239, 0.007559, 0.007795, 0.007941, 0.00799, 0.007941, 0.007795, 0.007559, 0.007239, 0.006849
```
### Gaussian Blur Shader (7 points) ###
Add code to the shader file `blur.frag.glsl` in order to implement a
post-process effect that blurs your 3D scene. A Gaussian blur effectively
performs a weighted average of NxN pixels and stores the result in the pixel
at the center of that NxN box (this means N must always be odd). The larger
the blur radius, the smoother the blur will be. Additionally, altering the
weighting of the blur will increase or decrease its intensity. If you take a
look at slides 23 - 24 in the procedural color slides, you'll have a better
idea of how a Gaussian blur works.
In order to achieve the image below, create a const array of 121 floats just
__above__ main(), hard-coding into it the kernel values from the Gaussian kernel
listed below. Index into
this array the same way you did your Z-buffer in hw03 to treat it like an 11x11 array.
```
0.006849, 0.007239, 0.007559, 0.007795, 0.007941, 0.00799, 0.007941, 0.007795, 0.007559, 0.007239, 0.006849,
0.007239, 0.007653, 0.00799, 0.00824, 0.008394, 0.008446, 0.008394, 0.00824, 0.00799, 0.007653, 0.007239,
0.007559, 0.00799, 0.008342, 0.008604, 0.008764, 0.008819, 0.008764, 0.008604, 0.008342, 0.00799, 0.007559,
0.007795, 0.00824, 0.008604, 0.008873, 0.009039, 0.009095, 0.009039, 0.008873, 0.008604, 0.00824, 0.007795,
0.007941, 0.008394, 0.008764, 0.009039, 0.009208, 0.009265, 0.009208, 0.009039, 0.008764, 0.008394, 0.007941,
0.00799, 0.008446, 0.008819, 0.009095, 0.009265, 0.009322, 0.009265, 0.009095, 0.008819, 0.008446, 0.00799,
0.007941, 0.008394, 0.008764, 0.009039, 0.009208, 0.009265, 0.009208, 0.009039, 0.008764, 0.008394, 0.007941,
0.007795, 0.00824, 0.008604, 0.008873, 0.009039, 0.009095, 0.009039, 0.008873, 0.008604, 0.00824, 0.007795,
0.007559, 0.00799, 0.008342, 0.008604, 0.008764, 0.008819, 0.008764, 0.008604, 0.008342, 0.00799, 0.007559,
0.007239, 0.007653, 0.00799, 0.00824, 0.008394, 0.008446, 0.008394, 0.00824, 0.00799, 0.007653, 0.007239,
0.006849, 0.007239, 0.007559, 0.007795, 0.007941, 0.00799, 0.007941, 0.007795, 0.007559, 0.007239, 0.006849
```
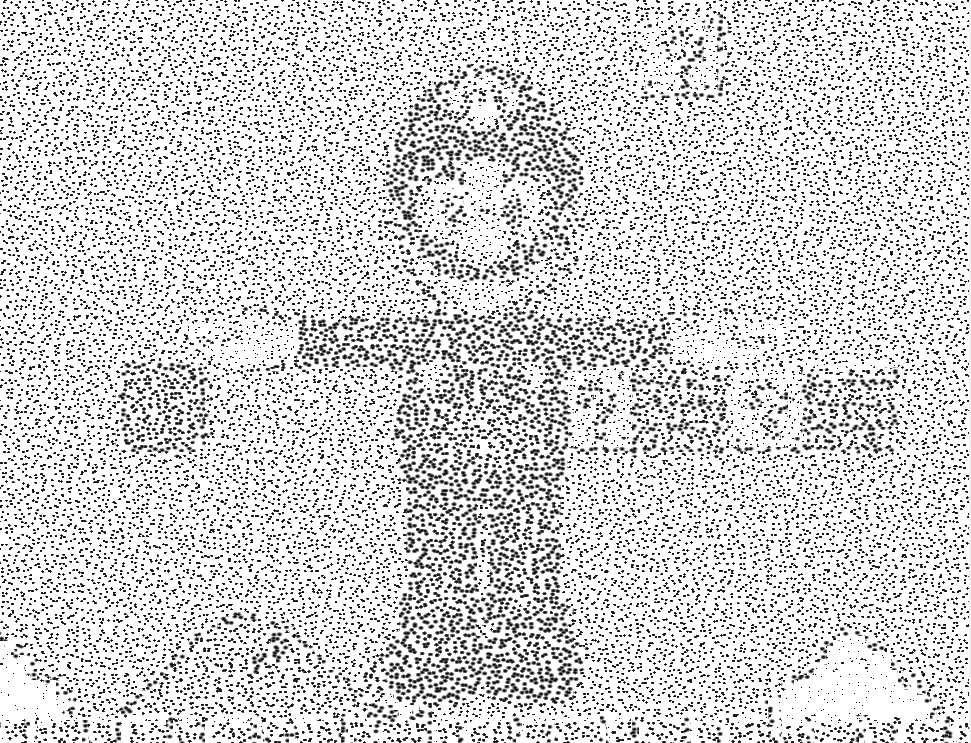
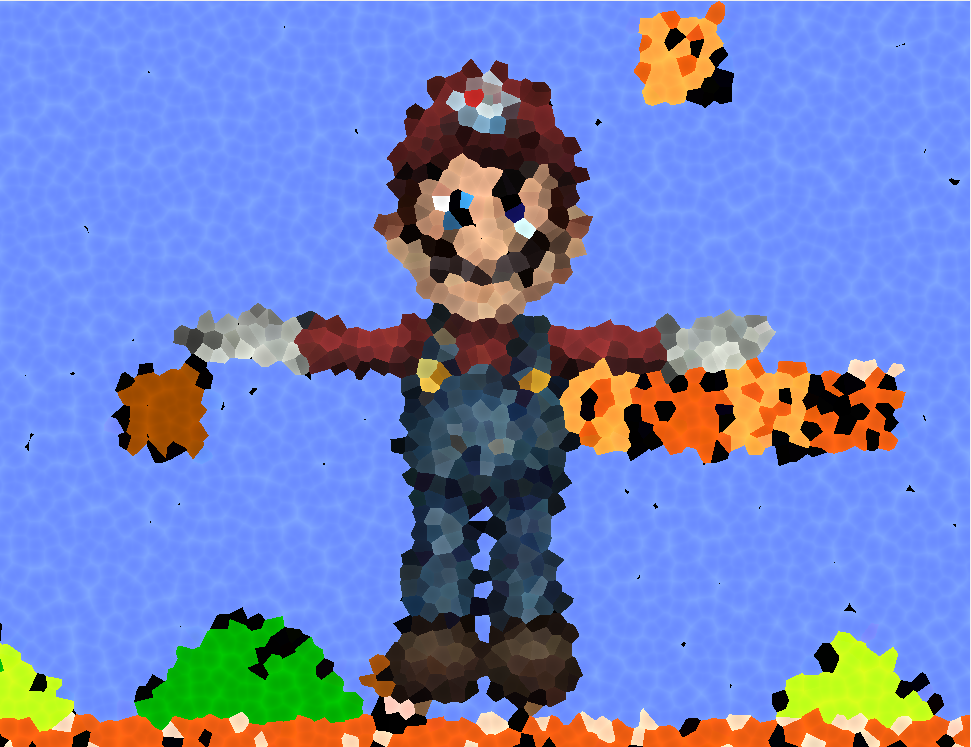
 ### Custom noise-based post-process shader (25 points) ###
Modify `custom_post.frag.glsl` so that the shader uses one of the noise functions discussed in class to warp the UV coordinated used to sample the texture of the 3D scene render. Your post-process effect must have clear artistic intention; refer to the example images below for ideas on how to make a specific effect.
### Custom noise-based post-process shader (25 points) ###
Modify `custom_post.frag.glsl` so that the shader uses one of the noise functions discussed in class to warp the UV coordinated used to sample the texture of the 3D scene render. Your post-process effect must have clear artistic intention; refer to the example images below for ideas on how to make a specific effect.

 For the blue crystal effect, Worley noise was sampled as a height field, and its slope in X and Y was computed. That slope was used to choose a direction in which to warp the UV coordinates, and to create a false surface normal to use with a Blinn-Phong reflection model to create the white highlights.
For the pointilism effect, the greyscale value of the image was sampled at each fragment's Worley cell center. This was then used to drive the
radius of a black circle signed distance function centered at the cell
point, where the circle's radius increased the darker the greyscale value.
For the mosaic effect, the image's color was sampled at each fragment's
Worley cell center then used to fill the cell it fell within.
Additionally, here are some general post-process effect ideas:
* Chromatic aberration, which reads from the red, green, and blue channels of
the original image at slightly different UV coordinates. This produces three
different images overlaid on each other, one for each channel.
* You can extend chromatic aberration to Hue/Saturation/Value space if you
wish. You can convert an RGB color to HSV, but we'll let you look up the
formula if you want to use it.
* Use a sine or cosine curve to apply a CRT-TV effect to the entire screen;
darken or brighten rows of pixels based on the value of the curve. The higher
the frequency of your curve, the smaller and more frequent the lines become.
* You can find additional inspiration from [ShaderToy](https://www.shadertoy.com/).
Coding Style (10 points)
-------
To help you write better C++ and GLSL code, we will score each of your homework assignments on three different style elements, which will change from week to week. For this assignment, make sure you:
- Declare any non-uniform and non-in/out global variables in your GLSL files as `const`.
- Write additional functions beyond `main` in your GLSL files where appropriate
- Allocate __no__ memory to the heap using `new` __or__ `make_unique` in your C++ code (it's just not necessary).
Extra Credit (Maximum 25 points)
---------
We will grant you extra credit if we deem your custom surface deformation shader
to be particularly complex or interesting. Take time to experiment with
different functions, both in your vertex shader and fragment shader, to produce
visually interesting results. If you want to spend the time, you could even
hard-code some sort of artistically-driven animation of your mesh based on
the `u_Time` variable that all your shaders support.
You may also create additional surface or post-process effect shaders for extra credit. The more
complex or visually interesting the effect, the more points you'll receive.
We suggest playing with signed distance functions
and modifications of various noise functions if you don't have any immediate ideas.
To add new shaders, you will have to add more `.glsl` files to your project. Add
additional options to the shader drop-down menus in `shadercontrols.ui`, and add code to `MyGL::initializeGL` and `MyGL::slot_ChangeSurfaceShader` or `slot_ChangePostShader` to
add your new shader to `MyGL`'s set of shader programs.
If you are interested in playing with signed distance functions,
[here is a useful resource](http://iquilezles.org/www/articles/raymarchingdf/raymarchingdf.htm).
Here is a shader we created by rendering the red, green, and blue channels of
the image at different offsets:
For the blue crystal effect, Worley noise was sampled as a height field, and its slope in X and Y was computed. That slope was used to choose a direction in which to warp the UV coordinates, and to create a false surface normal to use with a Blinn-Phong reflection model to create the white highlights.
For the pointilism effect, the greyscale value of the image was sampled at each fragment's Worley cell center. This was then used to drive the
radius of a black circle signed distance function centered at the cell
point, where the circle's radius increased the darker the greyscale value.
For the mosaic effect, the image's color was sampled at each fragment's
Worley cell center then used to fill the cell it fell within.
Additionally, here are some general post-process effect ideas:
* Chromatic aberration, which reads from the red, green, and blue channels of
the original image at slightly different UV coordinates. This produces three
different images overlaid on each other, one for each channel.
* You can extend chromatic aberration to Hue/Saturation/Value space if you
wish. You can convert an RGB color to HSV, but we'll let you look up the
formula if you want to use it.
* Use a sine or cosine curve to apply a CRT-TV effect to the entire screen;
darken or brighten rows of pixels based on the value of the curve. The higher
the frequency of your curve, the smaller and more frequent the lines become.
* You can find additional inspiration from [ShaderToy](https://www.shadertoy.com/).
Coding Style (10 points)
-------
To help you write better C++ and GLSL code, we will score each of your homework assignments on three different style elements, which will change from week to week. For this assignment, make sure you:
- Declare any non-uniform and non-in/out global variables in your GLSL files as `const`.
- Write additional functions beyond `main` in your GLSL files where appropriate
- Allocate __no__ memory to the heap using `new` __or__ `make_unique` in your C++ code (it's just not necessary).
Extra Credit (Maximum 25 points)
---------
We will grant you extra credit if we deem your custom surface deformation shader
to be particularly complex or interesting. Take time to experiment with
different functions, both in your vertex shader and fragment shader, to produce
visually interesting results. If you want to spend the time, you could even
hard-code some sort of artistically-driven animation of your mesh based on
the `u_Time` variable that all your shaders support.
You may also create additional surface or post-process effect shaders for extra credit. The more
complex or visually interesting the effect, the more points you'll receive.
We suggest playing with signed distance functions
and modifications of various noise functions if you don't have any immediate ideas.
To add new shaders, you will have to add more `.glsl` files to your project. Add
additional options to the shader drop-down menus in `shadercontrols.ui`, and add code to `MyGL::initializeGL` and `MyGL::slot_ChangeSurfaceShader` or `slot_ChangePostShader` to
add your new shader to `MyGL`'s set of shader programs.
If you are interested in playing with signed distance functions,
[here is a useful resource](http://iquilezles.org/www/articles/raymarchingdf/raymarchingdf.htm).
Here is a shader we created by rendering the red, green, and blue channels of
the image at different offsets:
 Submission
--------
We will grade the code you have submitted to Canvas, so make sure you zip up
your entire project! Also make sure to commit all of your files to Github, and
add a comment on your Canvas submission with a link to your repository.
Submission
--------
We will grade the code you have submitted to Canvas, so make sure you zip up
your entire project! Also make sure to commit all of your files to Github, and
add a comment on your Canvas submission with a link to your repository.