{{FULL_COURSE}} Final Project - Mini Minecraft Milestone 2


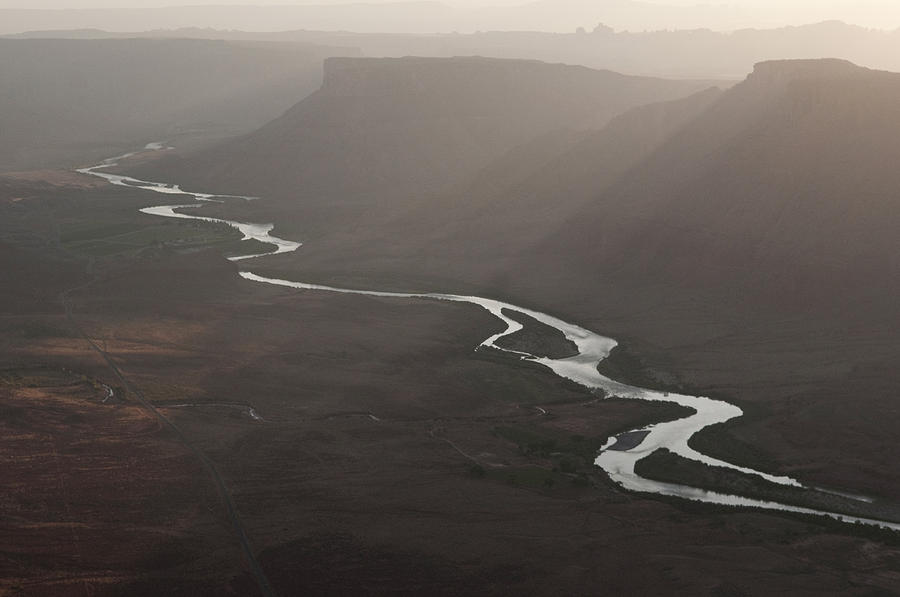
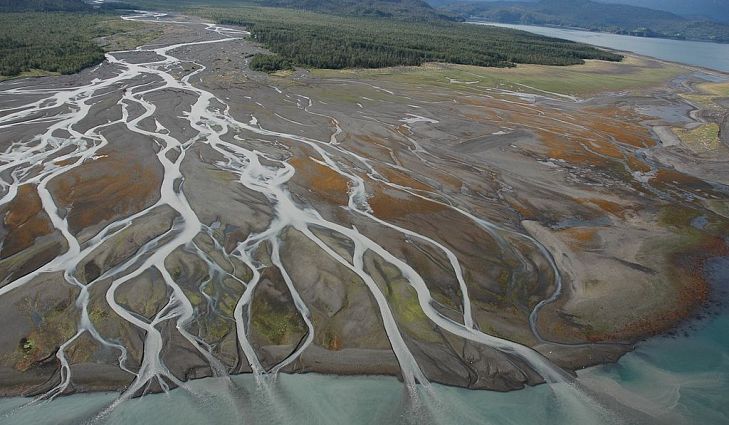
Overview ----- You will continue your implementation of Mini Minecraft, this week adding detail and/or efficiency to your existing project. Each group member may choose any one of the milestone features to implement this week; you are not beholden to implement the procedural terrain feature this week just because you implemented procedural terrain for Milestone 1. #### Again, please note that late days cannot be used for the final project milestones #### Supplied Code --------- You'll be working from the code your group wrote for milestone 1. However, we are supplying two image files so that one group member may apply textures to the terrain blocks, along with normal maps. [Click here to download the image files.](minecraft_textures_all.zip) Additional block types ---------------------- In addition to the `STONE`, `DIRT`, and `GRASS` block types defined in the base code, you should add the following blocks to your `BlockType` enum: * `WOOD` * `LEAF` * `BEDROCK` * `LAVA` * `WATER` * `ICE` You may add block types beyond these requirements as you see fit. Help Log (5 points) ------- Maintain a log of all help you receive and resources you use. Make sure the date and time, the names of everyone you work with or get help from, and every URL you use, except as noted in the collaboration policy. Also briefly log your question, bug or the topic you were looking up/discussing. Ideally, you should also the answer to your question or solution to your bug. This will help you learn and provide a useful reference for future assignments and exams. This also helps us know if there is a topic that people are finding difficult. If you did not use external resources or otherwise receive help, please submit a help log that states you did not receive external help. You may submit your help log as an ASCII (plain) text file or as a PDF. Refer to the Policies section of the course web site for more specifications. Week 2 Milestone Features (75 points each, Due Monday, December 2 at 12:00 NOON) ------- For the second week of Mini Minecraft, each group member will implement a feature that adds detail or efficiency to your existing game engine. As with the first milestone, each group will present their completed work in the form of a pre-recorded video __in class__. This video must be no longer than four minutes in length, and it must show each feature implemented as it appears when the program is run. Only footage of your game is required; you will talk over your video in class, so there's no need to add title cards or audio. The three main milestone features are: * Procedural generation of rivers using L-systems * Texturing and texture animation in OpenGL * Multithreading of terrain loading ### L-System Rivers ### Using a 2D L-system grammar structure, create at least two different branching river paths to place in your world. One river should be relatively straight, with a few small streams that branch off of it (these streams should be thinner in radius than the main river trunk). The other river should be winding and should begin to branch fairly quickly, looking more like a river delta than a main river body. Both river grammars should incorporate random numbers to influence path orientation and probability of branch generation. Your L-systems should be fairly large in scale (on the order of tens of chunks) in order to properly showcase their structure, as the Minecraft-style world is fairly low-resolution when it comes to geometry.
Linear River Delta River

Source

Source
Once you've generated a river, you should project it into your terrain so that the `WATER` blocks it consists of rest at a height of 128. Any terrain that nears your river should gradually slope down to a height of 128 rather than, say, having your river bore down through a mountain. Note that you should create rivers after the Perlin terrain has been created. A simple way of creating terrain that slopes toward a river is to simply carve away terrain at the edges of the river, gradually increasing the height at which terrain is allowed to exist until you reach either a certain height or a certain distance from the river. In order to test your L-system code outside the context of Mini Minecraft, we recommend using the Rasterizer base code to generate a simple black and white image of a tree made of simple lines, which is formed from the expansion and traversal of your L-system axiom and grammar rules. We highly recommend testing your L-system implementation in this manner, since you'll only have to deal with debugging the L-system functionality, rather than also worrying about how it's being portrayed in the Minecraft environment. You might consider using the following code features for your L-system class implementation: * A `Turtle` class that tracks the position, orientation, and (possibly) "recursion depth" of your drawing turtle. Recall that a turtle is simply a state marker for drawing graphic elements, such as simple lines. * A `std::stack` or `QStack` of `Turtle`s, which will be used to save and restore turtle states as you traverse your grammar string during the drawing phase. * A map from `char` or `QChar` to `std::string` or `QString` that represents what string a given character should expand to during the grammar expansion step. For example, `'X'` might map to `"[-FX]+FX"`, following the example grammar in the procedural graphics slides. * A map from `char` or `QChar` to a function pointer, where the function pointed to performs the drawing operation for the given character. For example, `'F'` might map to a function called `moveAndDrawLine`, which will move the turtle along its orientation vector and draw a line from its start point to its end point. To store a pointer to a void-returning function that takes no inputs, you might find it simpler to `typedef` a "nickname" for a function pointer type:
typedef void (*Rule)(void); // Now we can use Rule in place of the wordy void *(void)

QHash<QChar, Rule> charToDrawingOperation; // Easier for us to read, but still functions as a map from char to "pointer to a function that takes no inputs (i.e. void inputs) and returns void"
### Texturing and Texture Animation ### For this week's OpenGL feature, you'll have to implement several components: * A way to load images as textures into OpenGL for your world. * An addition to `lambert.frag.glsl` that makes use of a `sampler2D` to apply texture colors to a surface. * An alteration to `lambert.frag.glsl` to apply a Blinn-Phong specular reflection model with a cosine power that varies depending on block type. * An alteration to `lambert.frag.glsl` so that it includes a time variable as in Homework 5's OpenGL Fun, and uses this variable to animate the UVs on a `LAVA` block and `WATER` block. You may use a branching statement (i.e. IF statement) in your shader so that only `LAVA` and `WATER` are animated. * Enabling alpha blending in `MyGL::initializeGL` so that transparency can be applied to `WATER` blocks. * An additional interleaved VBO in the `Chunk` class in which you will store all non-opaque blocks (this is to handle how the OpenGL pipeline deals with transparency sorting). * An alteration to the VBO for the `Chunk` class, so that it additionally supports UV coordinates (vec2) and cosine power (float). You may also consider adding some sort of "animateable" flag to your VBO so that only triangles with the `LAVA` and `WATER` textures are animated in your shader. * Additional variables in the `ShaderProgram` class to support these texture features. Using the `BlockType` of a given block, set the UV coordinates of a square face in the `Chunk` VBO so that they correspond to the appropriate texture square in the image below. For example, if you were adding the VBO data for the top of a `GRASS` square, then you'd set the square's UVs so they aligned with the texture area labeled `GRASS TOP` (see image below). If you want to test block appearances, you might consider setting keyboard input that has the Player place a particular block in front of them. Remember that UV coordinates have a range of 0 to 1; the image below is divided into 16x16 block faces, so a single block face ranges from `<x, y>` to `<x+1/16, y+1/16>`. You may wish to refer to the base code provided for homeworks 4 and 5 to see how to read an image file and pass it to your GPU, and associate the texture with a `sampler2D` in a shader. Note that the OpenGL homework base code uses a `.qrc` file to let Qt know that it should include the texture files in its working directory, so that they may be found using the ":/" directory regular expression. When a block is a `LAVA` or `WATER` block, its UVs should be offset in your GLSL shader based on an incrementing time variable. Note that there are rows of `WATER` and `LAVA` face textures in the provided texture image; you can repeatedly move the UVs of a `WATER` block or `LAVA` block across this row to give the illusion of moving fluid across the block surface. In order for transparency to work properly for `WATER` blocks, you will need to add the following two lines of code to `MyGL::initializeGL`: * `glEnable(GL_BLEND);` * `glBlendFunc(GL_SRC_ALPHA, GL_ONE_MINUS_SRC_ALPHA);` These tell the OpenGL pipeline that it should use the alpha channel (i.e. the W coordinate) of a fragment's color `vec4` to blend that fragment with the other fragments for its pixel. An alpha of 1 means the fragment is fully opaque, while an alpha of 0 means the fragment is fully transparent. Note that the order in which triangles are rendered will affect how the alpha blending appears, but we aren't going to worry about that for this milestone. Once you've set these flags, you'll need to modify the code that builds a `Chunk`'s VBO so that opaque blocks which are adjacent to transparent blocks have their faces added to the VBO data. This will allow terrain beneath the water to be rendered. The provided texture contains alpha channel information implicitly, so you shouldn't need to add an alpha attribute to your `Chunk` VBOs. As noted in the list above, you'll need two interleaved VBOs in your `Chunk` class. The first will contain all opaque blocks (e.g. `GRASS`, `STONE`, `LAVA`), while the second will contain all transparent blocks (e.g. `WATER`, `GLASS`, `ICE`). `MyGL` should render all opaque VBOs first, then all transparent VBOs so that the OpenGL pipeline can correctly sort the rendered triangles according to their alpha (transparency) values. The cosine power for the Blinn-Phong reflection model in your shader must also vary depending on block type. We will not define exact powers per block type, but in general if a block is made of a "harder" material then it should have a tighter specular reflection (i.e. a higher cosine power). For example, a `STONE` block should be shinier than a `DIRT` or `GRASS` block, which should be nearly Lambertian in appearance and therefore should have a low cosine power. `WATER` should, of course, be very shiny. For 5 extra credit points, use a texture map to determine cosine power on a per-fragment basis rather than on a per-block basis. You'll have to design your own texture to make this work, but you'll be able to render blocks more "accurately", such as the metal bits in ore blocks being shinier than the stone around them. ![](minecraft_textures_all_labeled.png) ### Swimming and Multithreaded Terrain Generation ### You'll implement several different components for this milestone feature: * Altering the player's physics and controls when the player is touching a `WATER` or `LAVA` block to simulate swimming. * Adding multithreading functionality to prevent the gameplay from slowing down when new terrain is generated to expand the world. During the player's collision detection function, `WATER` and `LAVA` blocks should __not__ cause the player to stop moving. Instead, the player should move at 2/3 its normal speed (both in terms of gravity and lateral movement) and should be able to swim upwards at a constant rate by holding `Spacebar`. Additionally, when the player's `Camera` is inside a `WATER` block, a blue overlay with 30% opacity should cover the screen, while a `LAVA` block should cause a red overlay. You can create these overlay effects by rendering a quadrangle in NDC space (-1 to 1) almost at the near clip plane (almost z = 0) with no view-projection matrix applied to it. You may wish to write a separate shader program (i.e. a new `.glsl` file) to render this quadrangle. Note that transparency is explained in the Texturing and Texture Animation section above. To implement multithreading, you will make use of the `QRunnable` and `QThreadPool` classes. The `QRunnable` class is an "interface" class representing some sort of task that needs to be run, such as the computation of FBM to generate a terrain height field. If you create a class that inherits from `QRunnable` and override its `run` function, you can pass your `QRunnable` subclass to the `QThreadPool` class's global static instance to have your task be executed on a separate CPU core from your main Mini Minecraft program. This will allow your terrain generation to occur without slowing down the execution of your gameplay. However, the `QRunnable` may complete its terrain generation process at the same time as other parallel `QRunnable`s, or even in the middle of a render call in your main game thread. In order to avoid race conditions, such as two `QRunnable`s trying to write to your `Terrain` data structure at the same time, you should implement the following safeguards: * Create an instance of `QMutex` to which all of your `QRunnables` have a reference or pointer. Whenever a `QRunnable` begins a task that may cause a race condition, such as adding a new `Chunk` to your `Terrain`, invoke `QMutex::lock()` so any other `QRunnable` instances are forced to wait until `QMutex::unlock()` is called before they can proceed to their race condition process. * As implied above, call `QMutex::unlock()` when a `QRunnable` is finished with its race condition task so that other terrain generating threads can proceed, otherwise your terrain generation will stall indefinitely as threads wait indefinitely for the mutex to be unlocked. * Add a list of `Chunk`s that are _going_ to be added to your `Terrain` structure, and have your threads append to this list. At one point in `MyGL::timerUpdate`, iterate over this list and add its elements to your `Terrain`'s `Chunk` map. This prevents concurrent modification of your main `Terrain` data structure while attempting to render the scene. You will use your `QRunnable` subclass to invoke your terrain height field generation function to create the entire contents of one `Chunk` whenever you need to create new terrain for your world, such as when the `Player` moves near the boundary of the presently existing terrain. This will allow your gameplay to continue unhindered while a separate CPU core (or several CPU cores) compute the new terrain. Submission -------- #### Make sure your group commits a readme.txt that explains which group member implemented which feature for this milestone! #### Additionally, in your readme, briefly describe __how__ you implemented your chosen features. Discuss any difficulties you encountered when coding the project, and explain the approach you took to implementing each feature (e.g. "I chose to cast rays from the corners of my player's bounding box for collision detection because I thought it might be an easier approach than overlap checking.") __Your group will present a pre-recorded video of your milestone implementations in class on Monday; you must submit the video to the course dashboard along with your commit link!__ We will grade the code you have pushed to your GitHub repository, so make sure that you have correctly committed all of your files! Once you have pushed your finished project to GitHub, submit a link to your commit through the course dashboard. If you click on the Commits tab of your repository on Github, you will be brought to a list of commits you've made. Simply click on the one you wish for us to grade, then copy and paste the URL of the page into your text file. #### Each group member should submit a commit link to the course Dashboard! ####